问答:针对 visionOS 构建 App
2024 年 1 月 11 日
在过去的几个月里,Apple 专家在世界各地的 Apple Vision Pro 开发者实验室中回答了有关 visionOS 的问题。以下是他们被问到的一些最常见问题的答案,包括对实体、沉浸式空间、碰撞形状等新概念的重要见解。
如何使用手势与实体交互?
实现基于手势的实体交互需要三个重要元素:
- 实体必须具有 InputTargetComponent。否则,它完全无法接收手势输入。
- 实体必须具有 CollisionComponent。碰撞组件的形状定义了手势实际可以击中的区域,因此请确保正确指定碰撞形状,以便与实体进行交互。
- 你使用的手势必须针对你尝试与之交互的实体 (或任何实体)。例如:
private var tapGesture: some Gesture {
    TapGesture()
        .targetedToAnyEntity()
        .onEnded { gestureValue in

            let tappedEntity = gestureValue.entity

            print(tappedEntity.name)
        }
}
为交互式实体提供一个 HoverEffectComponent 也是不错的主意,这让系统能够在用户查看实体时触发标准的突出显示效果。
我应该使用窗口组、沉浸式空间,还是两者皆用?
当你决定为 App 中的特定功能使用哪种场景类型时,请考虑窗口、空间容器和沉浸式空间之间的技术差异。
以下是一些重要的技术差异,请在做出决定时加以考虑:
- 当沉浸式空间打开时,用户打开的其他 App 的窗口和空间容器将被隐藏。
- 窗口和空间容器会裁剪超出其范围的内容
- 用户可以完全控制窗口和空间容器的放置。App 可以完全控制沉浸式空间中内容的放置。
- 空间容器具有固定大小,窗口可调整大小。
- ARKit 仅在具有开放的沉浸式空间时才将数据传送到你的 App。
探索 Hello World 示例代码,熟悉 visionOS 中每种场景类型的行为。
如何可视化场景中的碰撞形状?
使用“调试可视化”菜单中的“碰撞形状”调试可视化;你还可以在该菜单中找到其他几个有用的调试可视化。有关调试可视化的信息,请查看诊断运行中的 App 出现的外观问题。
可以将 SwiftUI 视图放置在沉浸式空间中吗?
当然可以!你可以使用 offset(x:y:) 和 offset(z:) 方法将 SwiftUI 视图放置在沉浸式空间中。请务必记住,这些偏移量是以点而非米为单位指定的。你可以利用 PhysicalMetric 将米转换为点。
如果我想相对于现实视图中的实体定位 SwiftUI 视图,该怎么办?
使用 RealityView 附件 API 创建 SwiftUI 视图,并使其可作为 ViewAttachmentEntity 进行访问。该实体可以像任何其他实体一样定位、定向和缩放。
RealityView { content, attachments in

    // Fetch the attachment entity using the unique identifier.
    let attachmentEntity = attachments.entity(for: "uniqueID")!

    // Add the attachment entity as RealityView content.
    content.add(attachmentEntity)

} attachments: {
    // Declare a view that attaches to an entity.
    Attachment(id: "uniqueID") {
        Text("My Attachment")
    }
}
可以通过编程来定位窗口吗?
没有 API 可用于定位窗口,但我们很乐意了解你的用例。请提交改进请求。有关本主题的更多信息,请查看定位和调整窗口大小。
有没有办法知道用户在查看什么?
如采用隐私和用户偏好的最佳实践 中所述,系统在处理摄像头和传感器输入时,不会直接将信息传递给 App。因此,并无方法可获得精确的眼球运动或确切的视线。相反,重点应是创建人们可以交互的界面元素,并让系统管理交互。如果你有一个无法以这种方式运作的用例,并且它不需要明显的眼球运动追踪,请提交改进请求。
visionOS 上何时调用 onHover 和 onContinuousHover 操作?
当手指悬停在视图上,或连接的触控板上的指针悬停在视图上时,将调用 onHover (英文) 和 onContinuousHover 操作 (英文)。
可以在 App 中展示我自己的沉浸式环境纹理吗?
如果你的 App 打开了 ImmersiveSpace,则可以使用 UnlitMaterial 创建一个大球体,并将其缩放为内向式的几何体:
struct ImmersiveView: View {
    var body: some View {
        RealityView { content in
            do {
                // Create the sphere mesh.
                let mesh = MeshResource.generateSphere(radius: 10)

                // Create an UnlitMaterial.
                var material = UnlitMaterial(applyPostProcessToneMap: false)

                // Give the UnlitMaterial your equirectangular color texture.
                let textureResource = try await TextureResource(named: "example")
                material.color = .init(tint: .white, texture: .init(textureResource))

                // Create the model.
                let entity = ModelEntity(mesh: mesh, materials: [material])
                // Scale the model so that it's mesh faces inward.
                entity.scale.x *= -1

                content.add(entity)
            } catch {
                // Handle the error.
            }
        }
    }
}
我已有立体视频,如何将其转换为 MV-HEVC?
AVFoundation 提供了 API,以编写 MV-HEVC 格式的视频。
要将视频转换为 MV-HEVC,请按以下步骤操作:
-
为左右视图各创建一个 AVAsset。
-
使用 AVOutputSettingsAssistant 获取适用于 MV-HEVC 的输出设置。
-
指定水平视差调整和视野 (特定于资源)。我们来看一个示例:
var compressionProperties = outputSettings[AVVideoCompressionPropertiesKey] as! [String: Any]

        // Specifies the parallax plane.
        compressionProperties[kVTCompressionPropertyKey_HorizontalDisparityAdjustment as String] = horizontalDisparityAdjustment

        // Specifies the horizontal FOV (90 degrees is chosen in this case.)
compressionProperties[kCMFormatDescriptionExtension_HorizontalFieldOfView as String] = horizontalFOV-
创建一个 AVAssetWriterInputTaggedPixelBufferGroupAdaptor 作为 AVAssetWriter 的输入。
-
为左右视频轨道各创建一个 AVAssetReader。
-
读取左右轨道,然后将匹配的样本附加到标记的像素缓冲区组适配器中:
// Create a tagged buffer for each stereoView.
                        let taggedBuffers: [CMTaggedBuffer] = [
                            .init(tags: [.videoLayerID(0), .stereoView(.leftEye)], pixelBuffer: leftSample.imageBuffer!),
                            .init(tags: [.videoLayerID(1), .stereoView(.rightEye)], pixelBuffer: rightSample.imageBuffer!)
                        ]

                        // Append the tagged buffers to the asset writer input adaptor.
                        let didAppend = adaptor.appendTaggedBuffers(taggedBuffers,
                                                    withPresentationTime: leftSample.presentationTimeStamp)
如何在 visionOS 上的 RealityKit 中照亮场景?
你可以通过以下方式在 visionOS 上的 RealityKit 中照亮场景:
-
使用系统提供的自动照明环境,可根据真实环境对环境进行更新。
-
通过 ImageBasedLightComponent 提供自己的基于图像的照明。要查看示例,请创建一个新的 visionOS App,选择 RealityKit 作为沉浸式空间渲染器,然后选择 Full 作为沉浸式空间。
我发现 visionOS 不支持 CustomMaterial。是否有方法可以创建具有自定义着色的材质?
你可以使用 Shader Graph 在 Reality Composer Pro 中创建具有自定义着色的材质。以这种方式创建的材质可以作为 ShaderGraphMaterial 供 App 访问,以便你可以动态更改代码中着色器的输入。
有关 Shader Graph 的详细介绍,请观看探索 Reality Composer Pro 中的材质。
如何相对于设备的位置定位实体?
在 ImmersiveSpace 中,你可以使用 queryDeviceAnchor(atTimestamp:) 方法获取设备的完整转换。
进一步了解如何构建 visionOS 的 App
问答:针对 visionOS 进行空间设计
Get expert advice from the Apple design team on creating experiences for Apple Vision Pro.
View now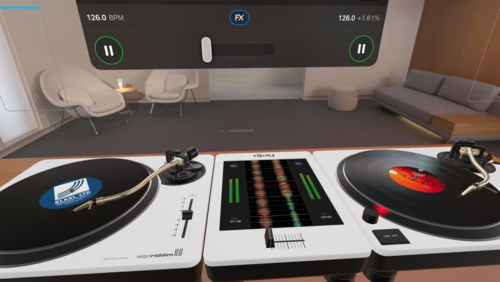
Spotlight on: Developing for visionOS
Learn how the developers behind djay, Blackbox, JigSpace, and XRHealth started designing and building apps for Apple Vision Pro.
View now
Spotlight on: Developer tools for visionOS
Learn how developers are using Xcode, Reality Composer Pro, and the visionOS simulator to start building apps for Apple Vision Pro.
View now本文包含的示例代码是根据《Apple 示例代码许可》(英文) 提供的。